Stirling-Motor

von Johannes Kramlinger

Der Stirling-Motor ist ein relativ einfacher Heißluftmotor, der uns im Wahlpflichtgegenstand „Hands-on Experiments“ auf den ersten Blick fasziniert hat. Doch als Erstes stellt sich die Frage, wie dieser Motor überhaupt funktioniert.

Wie funktioniert ein Stirling-Motor?

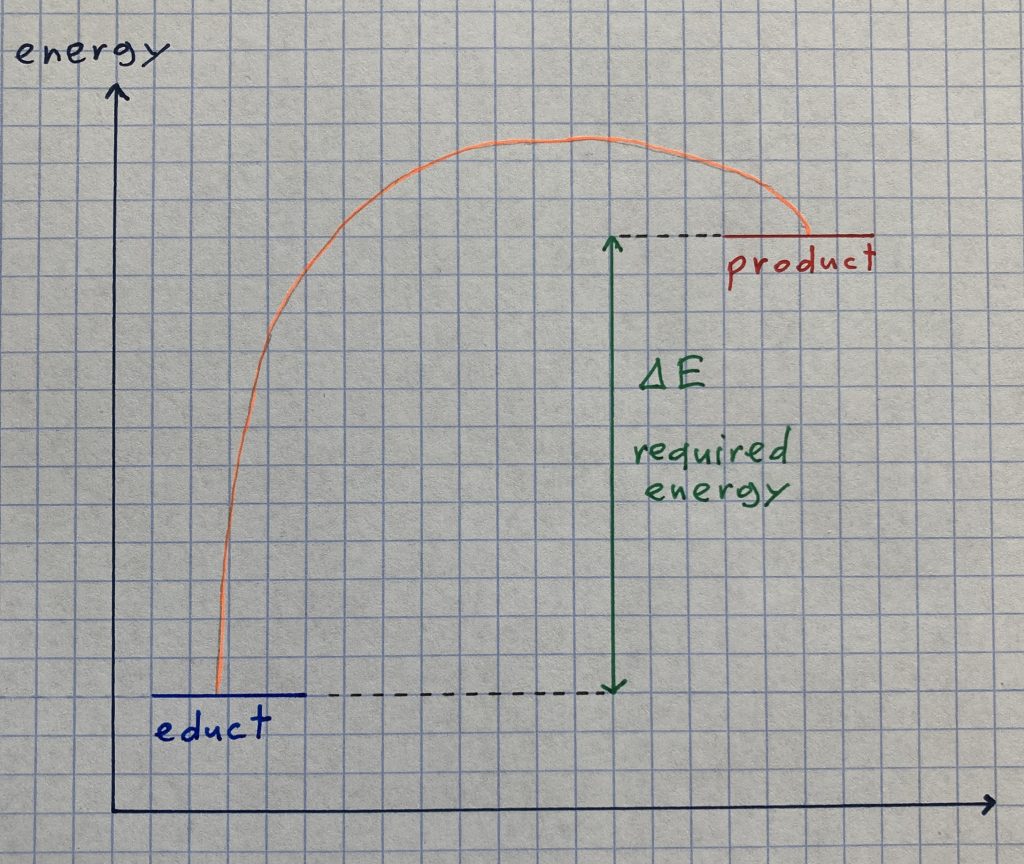
Generell kann man das Funktions-Prinzip in 4 Sätzen erklären:

  • In einem abgedichteten, von einer Seite beheizten Zylinder schiebt ein Kolben (Verdrängerkolben) die eingeschlossene Luft im ständigen Wechsel zwischen der heißen und der kalten Seite hin und her.
  • Die Luft wird dadurch abwechselnd erwärmt und abgekühlt, was zu einer abwechselnden Ausdehnung und Zusammenziehung und damit auch zu einem abwechselnd höheren und niedrigeren Druck der Luft führt.
  • Dieser pulsierende Luftdruckwechsel wird über einen mit dem Hauptzylinder verbundenen Kolben (Arbeitskolben) in die Bewegung einer Kurbelwelle mit Schwungrad umgesetzt: Überdruck schiebt ihn weg, Unterdruck saugt ihn an.
  • Mit einem kleinen Teil der dabei erzeugten Energie wird auch der Verdrängerkolben bewegt, das System hält sich auf diese Weise selbst in Gang.
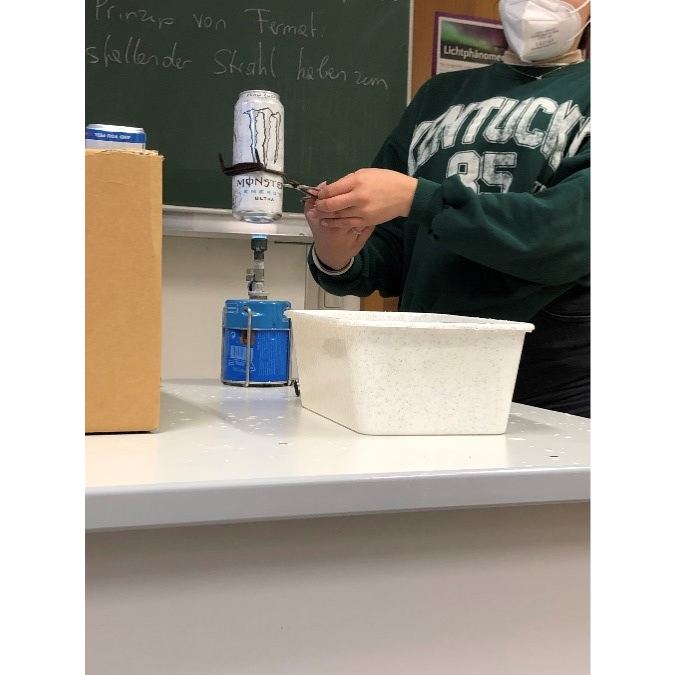
Versuch 1

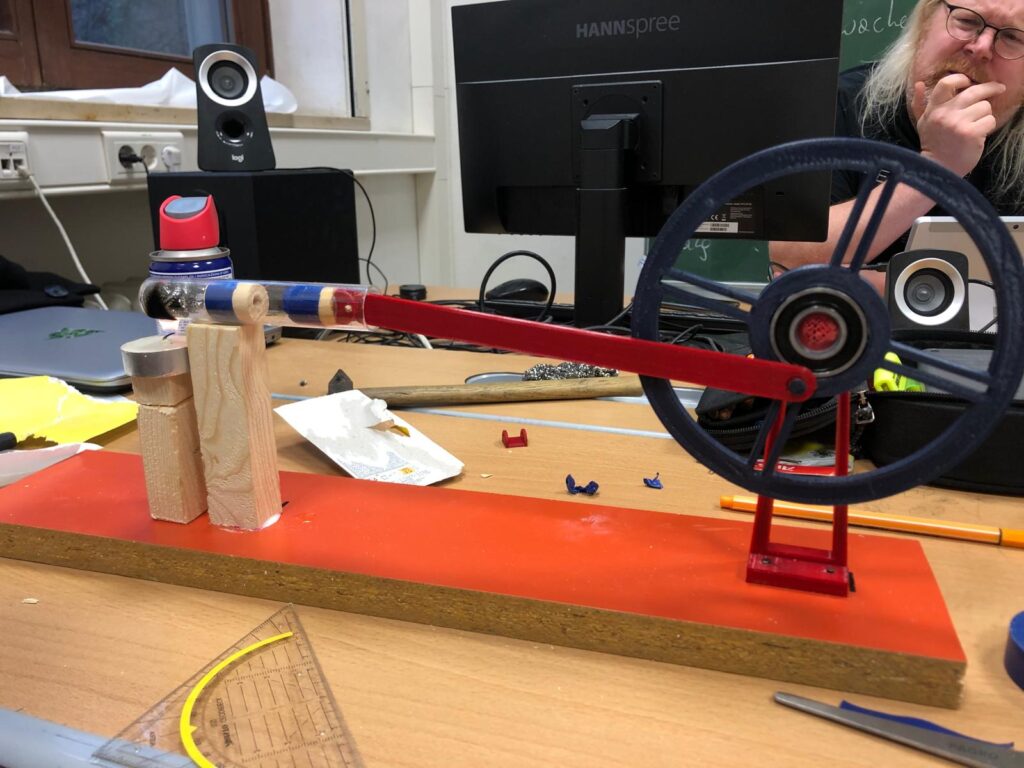
Die Idee, einen Stirling-Motor zu bauen, erhielten wir durch ein Video auf YouTube. In diesem wurde der Bau sehr einfach gezeigt, allerdings stellte er sich schwieriger heraus als gedacht.

YouTube-Video, welches als Inspiration für den ersten Versuch diente

Wie man in dem Foto sehen kann, gibt es in dieser Variante keinen Arbeitskolben. Dies sollte jedoch kein Problem sein. Ein Problem war allerdings, dass der Zylinder eine Verengung an der Öffnung aufwies und es daher unmöglich war, den Kolben perfekt abzudichten und die Reibung des Kolbens gering zu halten. Dadurch ist viel Luft seitlich verlorengegangen. Dasselbe gilt auch für die Düse.

Vom YouTube-Video inspirierter Stirling-Motor

Versuch 2

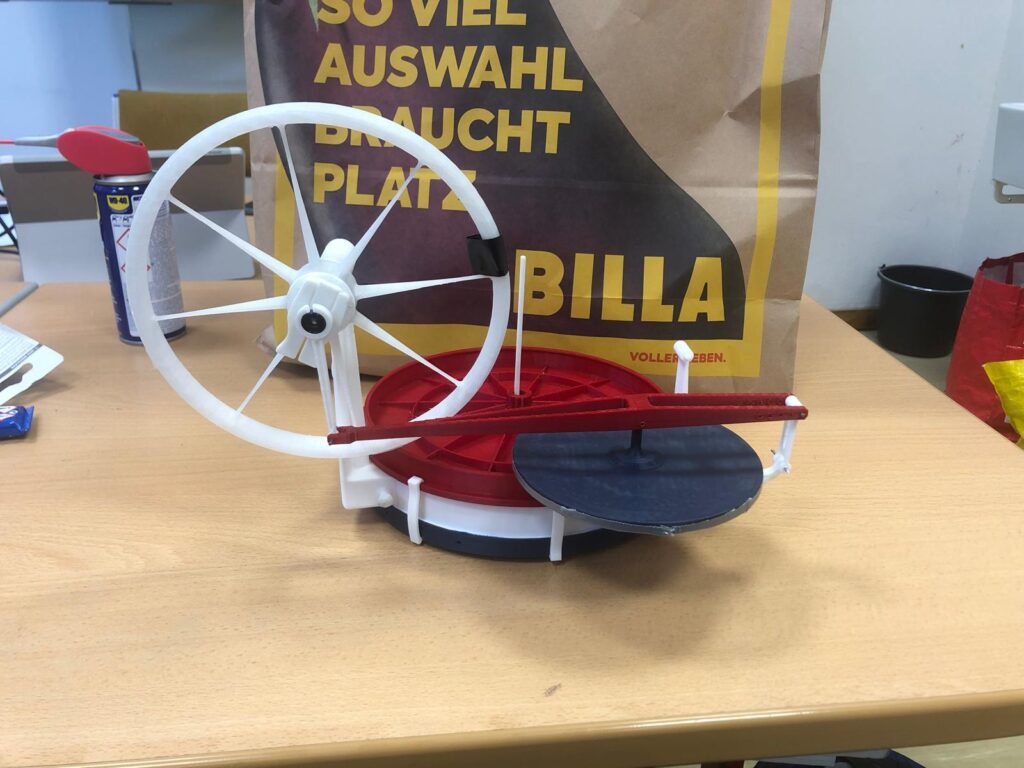
Von einem ersten erfolglosen Versuch ließen wir uns natürlich nicht unterkriegen und unternahmen sofort einen weiteren Versuch. Nach einiger Zeit an Recherche stießen wir auf ein rein aus dem 3D-Drucker stammendes Modell, welches vor einigen Jahren von einem neuseeländischen Professor ins Internet gestellt worden war. Im nächsten Augenblick waren die Teile ausgedruckt und das Zusammenbauen konnte beginnen.

Nach den ersten Bauschritten erlebte die Motivation ein Hoch, da alle Beteiligten sehr zuversichtlich waren, dass dieses Projekt, welches uns nun schon seit einigen Stunden beschäftigte, nun endlich ein Ende hat. Als alle Teile verbaut waren und die Nerven bereits blank lagen, kam die schockierende Wendung: Der Motor funktionierte nicht. Uns blieb nur mehr eines übrig: Einstellungen verbessern. Tests unternehmen. Nochmal von vorne.

Nachdem wir viele Stunden experimentierten, schwand die Hoffnung. Schließlich wurde auch dieses Modell aufgegeben.

Komplett 3D-gedruckter Stirling-Motor nach Vorlage von neuseeländischem Professor

Ein sehr wahrscheinlicher Grund des Scheiterns war die Tatsache, dass wir nicht das im Original verwendete Material ABS (Acrylnitril-Butadien-Styrol), sondern alle Teile mit PLA (Polylactic Acid) gedruckt haben. Diese Materialien weisen nämlich verschiedene Schmelztemperaturen und, viel wichtiger, verschiedene Flexibilitäten auf.

Video von neuseeländischem Professor, von dem wir die 3D-Druck Dateien haben

Versuch 3

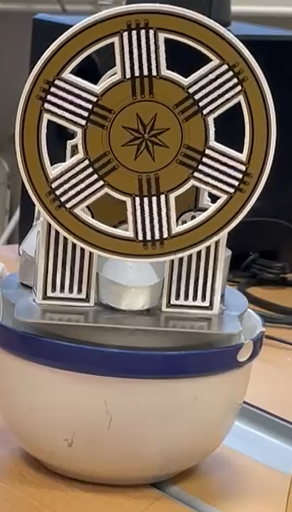
Nach dem vorherigen Versuch war der Wille, weiterzuarbeiten, sehr klein, doch unser Professor besorgte uns den Stirling-Motor Bausatz von AstroMedia (keine bezahlte Werbung). Unsere Hoffnung stieg noch ein letztes Mal an, da dies ein Bausatz ist und folglich funktionieren muss, oder?

Nachdem wir allen Schritten in der Anleitung gefolgt waren, kam es zu den ersten Tests. Wie bei den vorherigen Versionen war die Spannung groß und die Ernüchterung danach noch größer, denn auch dieser funktionierte nicht.

Jedoch gibt es auf der letzten Seite der Anleitung einige Tipps, denen man nachgehen kann, um ihn vielleicht doch noch zum Laufen zu bringen. In unserem Fall haben wir mit dem Wundermittel WD40 (ebenfalls keine bezahlte Werbung) den Arbeitskolben und die Verbindungen der Kolben zur Kurbelwelle eingefettet. Dann haben wir es noch einmal probiert. Und er lief, für circa 15 Sekunden.

Doch diese Zeit genügte, um uns ein letztes Mal zu motivieren, damit er schlussendlich wirklich funktioniert. Wir haben weitere Feinjustierung betrieben und mit Eiswürfeln den Temperatur-Unterschied erhöht. Und dieses Mal war es so weit: er lief, für circa 30 Minuten. Auch wenn laut Anleitung bis zu 60 Minuten möglich sind, waren wir mit der Hälfte der maximalen Zeit schon mehr als zufrieden.

Zusammengebauter AstroMedia Stirling-Motor

Fazit

Wir haben im Prozess des Arbeitens einiges festgestellt:

  • Ein Stirling-Motor ist in der Umsetzung deutlich komplizierter und zeitaufwendiger als gedacht.
  • Nur wenige kleine Fehler können ein solches Projekt bereits zum Scheitern verurteilen.
  • Selbst mit einem professionellen Bausatz gibt es keine Garantie, dass es sofort funktioniert.

Allerdings war die Freude, nachdem der Motor endlich funktioniert hat, so groß, dass wir es jedem Interessierten empfehlen können.

Und wenn er noch nicht abgekühlt ist, dann dreht er sich noch heute.

Quelle:
Hünig, Klaus: Der Stirling-Motor. Bauanleitung. Waltrop, AstroMedia

Foto- und Videocredit: © by BRG Steyr Michaelerplatz

The liquid powders

written by Michael Himmelbauer

Firstly, you put a few grams of two white powders into a beaker and after stirring for a minute, it turns into a turbid liquid. What sounds to be impossible (or fake news, as we would call it), can be realized with the help of some components you may not have at home, but luckily can be found in the chemistry room:

  • two beakers
  • a spoon
  • a scale
  • a brick of wood
  • the stars of the experiment: 15 grams of Barium hydroxide (Ba(OH)2) and 5 grams of Ammonium thiocyanate (NH4SCN)
  • some water (H2O)

First of all, we weigh the required amount of the two powders with the help of the scale and put them into the two beakers as shown in the picture:

Next, we do something you better should not do if you don’t know what’s inside the beakers (fortunately, I know what I’m writing about): We pool the two powders into one beaker (in case you’ve got two different sizes: put it into the bigger one) and mix them with the help of the spoon. After some time stirring (and maybe a hurting arm), we recognize that inside the beaker, the powders disappeared and were replaced by a turbid white liquid. Furthermore, the fluid smells strange. In case you touch the bottom of the glass, you may find out that it feels cold (although the windows and the fridge are closed, so the cause of the low temperature is the beaker – even if you don’t believe it).

But why’s that? How can two powders that look almost similar turn into a liquid that stinks and cools down its environment?

To explain that chemical process, we have to take a look at the reaction equation of Barium hydroxide with Ammonium thiocyanate:

Ba(OH)2 + 8 H2O + 2 NH4SCN → Ba(SCN)2 + 2NH3(g) + 10 H2O

According to the equation, the educts Barium hydroxide (that consists of Ba(OH)2 and solid water (H2O)) and Ammonium thiocyanate (NH4SCN) react with each other. The products on the right side of the equation are Barium thiocyanate (Ba(SCN)2), Ammoniac (NH3) and liquid water (H2O). The turbid liquid consists of Barium thiocyanate and water, Ammoniac is released into the air as a gas that causes the unpleasant smell.

And in case you put the beaker onto the wept brick of wood, you might be frightened when you want to lift the glass because you may recognize that the ice-cold beaker sticks onto the brick of wood:

But why can a liquid that consists of two strange powders make a glass stick on a wooden part?

In order to answer this question, we have to know that the chemical reaction described above is considered to be an endotherm reaction as energy (in the form of warmth) is required all the time. This energy is taken from the environment around the powder in the glass, and that is why the glass cools down. And as we all know (or have at least learnt at school), water freezes in case the temperature drops below zero degrees. Caused by the fact that we put some water onto the brick of wood before mixing the powders, the breaker has frozen onto it.

The energy graph (a diagram that shows the amount of energy a substance contains) of an endotherm chemical reaction outlines that the products in the end have a higher level of energy than the educts at the beginning. In order to compensate the difference, energy in the form of heat is required and is taken from the environment.

To sum up, it can be stated that when pooling two special powders into one beaker, their state of aggregation turns into liquid and the required energy can make the glass freeze onto a brick of wood. Both are results that wouldn’t come to your mind when you’re thinking about powders, would they?

source:
Anon.: Entropische Zauberei. https://www.uni-wuerzburg.de/fileadmin/08020000/pdf/erlebnis/endotherm_reak.pdf
[last access: 01.02.2022]

fotocredit: (c) by Michael Himmelbauer

Pans, Heat, and Bonding 

by Sarah Diregger

While cooking, one can notice that metal becomes hot very quickly and wood or plastic is safer to touch if you’re not in the mood for a 2nd-degree burn. I’m sure everybody knows not to touch the pan while it sits on the stove. But why? What’s the difference between metal and plastic? Why does metal heat up so easily? 

Firstly, to prove my theory that metal heats up faster than plastic I experimented: 

You need a plastic rod, a metal rod, an infrared camera, and warm hands. You hold each rod in your hands for 1-2 minutes. Then you point the infrared camera at the two rods, and you can see the results immediately.  

Here, you can see an image of the two rods next to each other before the experiment: It’s very faint but I think you can make out two different sticks. The left one is metal, the right one plastic. 

This is what the plastic rod looks like after one hand held it: 

This is what the plastic rod looks like after 3 hands held it: 

This is what the metal rod looks like after a you hold it in your hand: 

On the scale at the bottom of the images, you can see which color symbolizes which temperature. Consequently, we can see that before the experiment, both were at about the same temperature. After the experiment, the plastic rod was only heated at the area you held it. However, the temperature of the warm hands spread farther and the area of warmth was greater than the size of your hands. 

The explanation for this phenomenon lies on the atomic level. It’s important to know that atoms form 3 different types of bonds: 

Covalent bond: Bond, in which atoms share electrons 

Ionic bond: One atom gives its valence (outermost) electron(s) to the other atom. Therefore, one atom acquires a positive charge and the second acquires a negative charge. Positive and negative attract each other, leading to the atoms forming a bond. 

Metallic bond: The nuclei (plural of nucleus) of the atoms arrange themselves in a fixed structure, while the negatively charged electrons move freely in between the positively charged nuclei. 

Here is an illustration to help you visualize what this looks like: 

Before I explain further, it’s crucial to know what heat is. Heat is basically the vibration of atoms and molecules within a substance. The more they vibrate, the hotter the substance is. 

We will be focusing on the last type of bond, the metallic bond. Since the electrons don’t have a fixed position within the atomic structure, they can move around more than the electrons in a covalent or ionic bond. If we look at the physical properties of heat, it’s obvious why metals, who have metallic bonds, conduct heat better. The electrons can vibrate easier and it’s easier for them to pass this vibration on to the next electrons. Plastic has a covalent bond. Therefore, the atoms within the polymer (the scientific name for plastic) are tied together tighter and vibrations can’t be transmitted as easily. 

In conclusion, metals transfer heat the best because of the type of atomic bonds they have. The metallic bond allows electrons to move between the nuclei. Therefore, the movement of heated electrons can be conveyed easier than in fixed bonds. Which important lesson do we learn in our day-to-day lives? Never use metal if you want to handle something hot because it doesn’t shield the heat. 

Sources:

https://www.edinformatics.com/math_science/why_metals_conduct.htm#:~:text=Metal%20is%20a%20good%20conduction,of%20their%20energy%20to%20them.

https://www.britannica.com/science/crystal/Conductivity-of-metals

https://www.lernhelfer.de/schuelerlexikon/chemie/artikel/waermeleitung#

https://chem.libretexts.org/Bookshelves/Physical_and_Theoretical_Chemistry_Textbook_Maps/Supplemental_Modules_(Physical_and_Theoretical_Chemistry)/Chemical_Bonding/Fundamentals_of_Chemical_Bonding/Metallic_Bonding

https://www.chemie.de/lexikon/Metallische_Bindung.html#:~:text=Als%20Metallische%20Bindung%20oder%20Metallbindung,Metallen%20und%20in%20Legierungen%20vorliegt.&text=Sie%20wird%20durch%20Anziehungskr%C3%A4fte%20zwischen%20Metall%2DIonen%20und%20freien%20Elektronen%20verursacht.

https://www.lernhelfer.de/schuelerlexikon/chemie/artikel/metallbindung

[last access: 24.01.2022]

Die große Implosion

von Jana, Pia und Eva

Wolltest du schon immer eine Dose explodieren lassen, aber du durftest nicht? Dann lass sie doch mit unserer Hilfe implodieren. Achtung! Bitte nur unter Aufsicht eines Erwachsenen durchführen! 😉 

Dazu brauchst du:   

  • Eine Dose
  • Eine Wanne mit Wasser 
  • Einen Bunsenbrenner 
  • Eine Zange zum Halten 
  • Evtl. ein Haargummi zum fixieren 

Als ersten Schritt musst du ca. 3 El Wasser in die Dose füllen, die Dose mit der Zange festhalten und mit einem Haargummi fixieren. Als nächstes musst du die Dose über den Bunsenbrenner halten, bis das Wasser darin kocht und dampft. Sobald das der Fall ist, musst du schnell reagieren! Du musst die Dose schnell umdrehen und sofort in die Wanne mit Wasser tauchen und achte darauf, dass die Öffnung der Dose zuerst im Wasser landet. Die Dose sollte dann sofort sehr stark zusammengedrückt werden.   

Was ist gerade passiert?  

Der Effekt, den du dabei gesehen hast, nennt sich Vakuumeffekt. Durch das Erhitzen des Wassers entsteht Wasserdampf, welcher die Luft in der Dose verdrängt. Wenn man nun die Dose abkühlt, kondensiert das Wasser, wodurch ein Vakuum entsteht. Durch den umgebenden Luftdruck wird die Dose zusammengedrückt. 

Hier findest du noch Videos von unseren implodierenden Dosen !

Yay, the water didn’t leak over the rim of my glass!

Sarah Diregger

I was pouring a bottle of water into my glass and got distracted for a second. When I looked at the glass of water again, I was really shocked. The water was too much for the glass to hold, but it didn’t flow over on the table. There was this “bubble” of water above the rim of the glass. For the record, it looked really fascinating. So, I wanted to know why this was the case. Magic? Some antigravitational forces? God, having mercy on me, so I don’t have to get a napkin and wipe the table? Like any person in the modern days, I asked Mr. Google for help. He kindly explained to me what the actual, scientific reason was behind it. 

To prove the explanations, I also conducted my own experiment. All you need is a pipette, different sized coins, water and maybe some napkins to dry up your workspace afterwards.  

Ein Bild, das Text, drinnen enthält.

Automatisch generierte Beschreibung

Then, using the pipette, I slowly dropped the water onto each coin and counted the drops. 

Type of coin Average amount of water drops 
2 Euro coin 41.3 
1 Euro coin 34.3 
20 Cent coin 34.3 
10 Cent coin 19.7 
2 Cent coin 20 
1 Cent coin 18.7 

Ok, so we’ve established that the amount of water drops depends on the surface area of the coin, but what causes the “bubble” on top to remain a bubble? It’s actually quite logical. 

First of all, it depends on the liquid. In our case it’s water. Water molecules are polar molecules. Now, you might ask yourself, “What the heck is a polar molecule?”. So, first of all, it’s important to know that a water molecule (H2OH2O) consists out of two Hydrogen and one Oxygen atom. The Hydrogen atoms have a slightly positive charge, and the Oxygen atom has a slightly negative charge. That means that the Oxygen atom of molecule A attracts the Hydrogen atom from molecule B. I drew a picture to help you visualize what I mean: 

The bond between the molecules is called cohesion. It keeps the molecules stuck together. Cohesion is strong, but not unbreakable. When the water is dropped on the coin, each water molecule is attracted to each other. Therefore, a thing called the surface tension (the “skin” of the bubble) forms. This is what keeps all of the water together and allows the water to move over the edge of the coin. Once there’s too much water over the edge, gravity overcomes the bubble, and it bursts. 

It is important, though, to remember that this only works with polar molecules. With nonpolar molecules, such as oil, the atoms from different molecules don’t attract each other and therefore, no bubble can be formed. To prove this, I tried the same experiment with the pipette and coin; but instead of water, I used oil. The result looked like this: 

Ein Bild, das Baumaterial, Stein enthält.

Automatisch generierte Beschreibung

Once the oil flowed over the edge of the coin, it leaked to the surface of the table. To be honest with you, it was quite a mess. I’m talking from experience, when I say this: Don’t ruin any tabletops because your parents will give you hell for it!  

In conclusion, the mysterious “bubble” on top of the glass (which is actually the surface tension) forms because of the attraction of the atoms between molecules, and the surface tension gives out when there is too much mass over the edge. Then, gravity becomes stronger than cohesion (the force between molecules) and the bubble bursts. But remember, this is only the case when the substance has polar molecules. 

Fotocredit: (c) Sarah Diregger

Siedepunkt von Wasser in Abhängigkeit vom Luftdruck

von Michael Himmelbauer

Bislang dachte ich, Wasser könne nur bei sehr hohen Temperaturen, also über 100°C, sieden. Das stimmt aber nur unter Normaldruck (ca. 1 bar).

Grundsätzlich gilt jedoch: desto höher der Umgebungsdruck, desto höher die Siedetemperatur.

Dazu gibt es einen ganz einfachen Versuch, für den man folgendes benötigt:

  • 1 (Plastik-)Spritze
  • Leitungswasser

Im Folgenden saugt man etwas Wasser mit der Spritze an. Nun muss man die Spritze vorne zuhalten (am besten mit einem Finger) und an der Spritze hinten anziehen.

Was passiert?

Es ist zu beobachten, dass das Wasser in der Spritze zu sieden beginnt.

Doch warum ist das so?

Die Siedetemperatur eines Stoffes (nicht nur von Wasser) hängt vom Umgebungsdruck, also meistens vom Luftdruck, ab. So ist diese am Mount Everest (8848 Meter Seehöhe) geringer als an der Küste des Meeres. (Der Luftdruck nimmt mit der Höhenlage ab, da nicht mehr so viele Luftschichten von oben drücken.)

Das ist der Grund, warum man Eier in höherer Lage länger kochen muss, damit sie den gewünschten Zustand erreichen oder das Kochen am Mount Everest länger dauert als im Tal.

Dieser Effekt wird bei einem Druckkochtopf genutzt. Beim Erhitzen durch den Herd wird der Druck im Kochtopf von einem Ventil im Deckel erhöht, wodurch der Druck innen ansteigt. Damit wird eine höhere Temperatur benötigt, um das Wasser zum Sieden zu bringen, und das Essen ist schneller gar. Deshalb wird diese Art von Kochtopf auch Schnellkochtopf genannt.

In der Physik werden die drei Aggregatzustände (fest, flüssig, gasförmig) und deren Übergänge in Abhängigkeit vom Druck in einem sogenannten Phasendiagramm dargestellt.

Von Wasser sieht das beispielsweise so aus:

Auf einem solchen Phasendiagramm ist eingezeichnet, unter welchen Druck- und Temperaturverhältnissen ein Stoff (in diesem Fall Wasser (H2O)) welchen Aggregatzustand einnimmt.

An den violetten Linien sind zwei verschiedene Aggregatzustände möglich, da eine gewisse Energiemenge nötig ist, um einen Stoff zum Schmelzen oder Sieden zu bringen, ohne dass sich die Temperatur erhöht. 

zum Diagramm: 1: Übergang flüssig – gasförmig (= sieden/verdampfen); 2: Übergang fest – gasförmig (= sublimieren); 3: Übergang fest – flüssig (= schmelzen)

Nur bei einem Temperatur- und Druckzustand kann der Stoff alle drei Aggregatzustände einnehmen, dem sogenannten Tripelpunkt (Punkt, an dem sich alle drei violetten Linien schneiden). Unterhalb des Drucks des Tripelpunktes ist der flüssige Aggregatzustand nicht möglich.

Zusammenfassend ist also festzuhalten, dass der Aggregatzustand eines Stoffes nicht nur von der Temperatur, sondern auch vom Umgebungsdruck abhängt.

Quelle:
Putz, Bruno: Faszination Physik 5 bis 6. Linz: Veritas-Verlag 2018, S. 98-99